Sunday, June 24, 2007

Here's how to make a huge mess of your yard

This weekend is the rental of the skid loader or "Bobcat". It's a really useful tool for moving rocks and dirt around and placing them right where you want them. It's also a dangerous tool, as after a hour you feel you have mastered everything there is to know and then you run over the tomatoes. At least, that's what I did. They survived in their raised planter, and after we scurried over to replace the masonry blocks they were not much worse for wear.

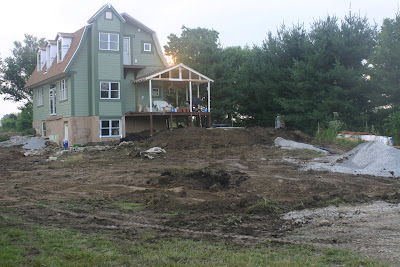
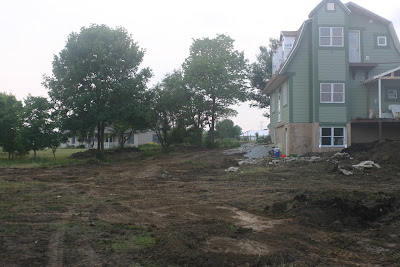
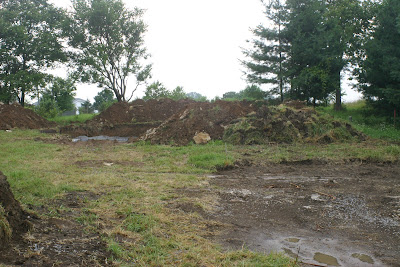
Moving all this dirt and backfilling around the house is exhausting--we got about 9 hours of sleep last night and didn't hardly move. Woke up really sore and stiff--who'd have thought that driving the Bobcat could beat you up so much? Here are some pictures to show you what's been happening. We need to finish it up tomorrow so we can take it back to Vandalia rental.


Linnea working on Saturday moving our supply of river rock. We call it river rock because that's what we had in California growing up. Out here in Ohio it's glacial rock, as a glacier went right through our house (where it would be anyway), cutting the limestone and granite into little bitty rocks and tumbling them as it went. So convenient to have a rock quarry on the back of the property.


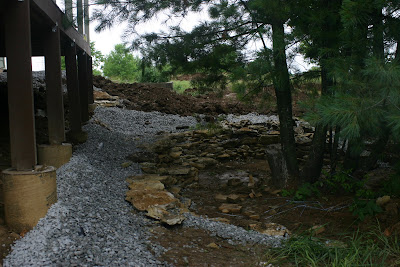
This is the front of the porch, showing the retaining wall under construction. The drain pipe from the gutter runs under the front eave to collect water and send it down towards the pond area. Yep, Linnea found a place for the pond that she wants to build.


Here is the front yard area--I told Linnea that this is the biggest mess she has ever made--it must be a whole acre that has been torn up. Compare it to this picture from before the Bobcat!

Sunday, June 17, 2007

Mom's Cafe

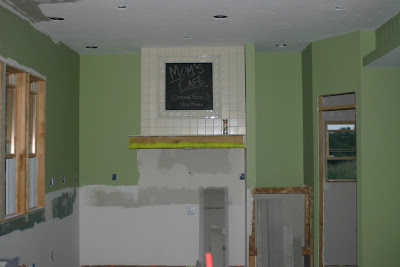
I haven't been able to tall about this project so far this weekend, but Linnea finished the tile front of the range hood. It's a monster 1,200 cfm exterior fan that has a 10" opening outside attached (somehow) to the 8" duct at the range hood. We puzzled about how to build the sheet metal duct, and ended up using leftover cement board to build a box over the hood that went up to the 10" opening for the blower motor.

Linnea and our youngest son spent part of Saturday and this evening finishing the tile over it. She got some chalk board paint from Lowes to add a message area that she can decorate as she wants. Linnea says "It's mine to decorate--it's not for everyday stuff". I think it looks cool.


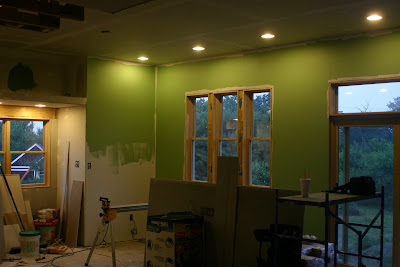
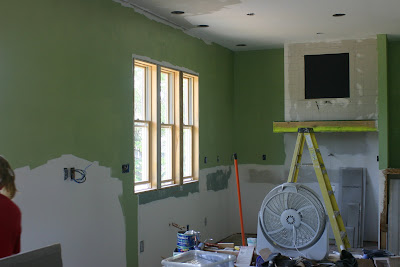
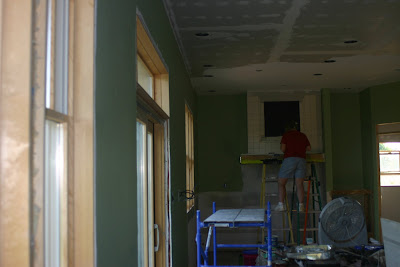
And here are some more pictures to show where the room paint is in the kitchen and living room. More painting tomorrow and it looks like we will start the final grade backfill and rough landscaping this week.


Saturday, June 16, 2007

What's happening?

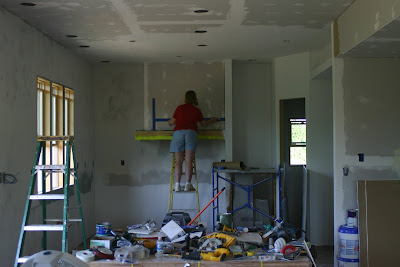
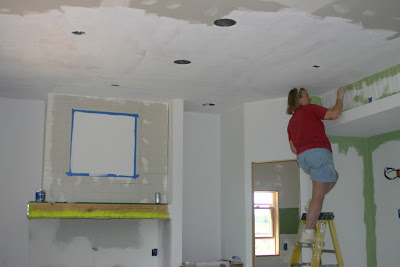
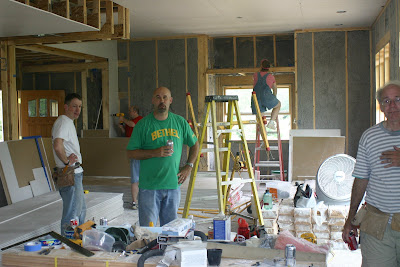
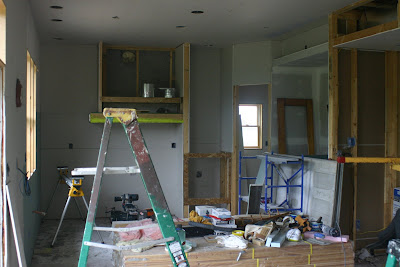
We have been working like mad to get the drywall done and get the house ready for paint. In a nutshell, we have finished the walls, ceilings, cement board for tile floors and showers and Linnea and our daughter have started painting the kitchen. Here are some pictures to show where we are.
This morning as we started work. From there, after laying out the tile for the range hood, we went to primer.

Cutting in the green heather #3 from Laura Ashley at Lowes

To here:

At the end of the day:

Thursday, June 07, 2007

Drywall in the homestretch

Here's a picture to tide you over until Sunday...it's another three day weekend as I am taking Friday off from work to spend on drywall. We have almost all of the ground floor finished, and will start tomorrow with the stairs going up to the first floor. I have to explain that we have not decided what to call the ground floor/first floor/downstairs and what to call the first floor/upstairs/second floor. You see, we have lived eight years in Europe and came to Ohio from England--where the ground floor is the one that has a front door. The first floor is the one you walk up stairs to from the ground floor. Here in the States it seems to be a little more confusing with the first floor being the ground floor and the second floor is the first floor. As clear as mud.

Anyways (my Mom would kill me for starting a sentence with "Anyways"), here is a picture of the basement and first floor with lights--new and improved. We are getting fluorescents for the can lights--the new ones from Sylvania seem to work well and don't have a color tinted toward green. The kelvin of the one's we like is unknown (from the packaging) but it is their 100W incandescent replacements that are 23W. A nice, yellow light very similar to the light from an incandescent.


The front of the house, now with running water and lights!


And the back of the house, looking into the living room.

Tuesday, June 05, 2007

Another tool review


The Bosch Drywall Screw driver bit tool review


While shopping at Lowes I found a screw driver tip from Bosch. It's their Drywall Dimpler/Driver and it's great. It attaches to your regular screw driver and turns it into a drywall driver and dimpler. Using a drill with a clutch set fairly low, it avoids overdriving screws and allows someone unskilled to set them accurately at the right depth. It's not perfect, but it works about 90% of the time. It's weakness is inside corners, where the drill body keeps the bit from being square on to the drywall--it leaves a slightly proud screw. My kids and I call these screws "need to be humbled screws" as they are slightly proud. We have a kid running around with either a hand powered screw driver or a battery powered one with a regular Phillps bit in it. It wears out pretty quickly when it slips in the cross slots of the screw, and I am not sure if the tip can be replaced or not, although it does come out.

About $10-15, depending on where you buy it. Reversable to lock out the built in clutch. Worth buying for a single house worth of work.

Insulation done, drywall underway

Well, the drywall went up a big way this weekend with the first annual Simonalle Drywall Party. We tried to see if drywall floated on soda up to the ceiling. It took more than just refreshments to get it there though--pizza turned out to be the ticket. We got almost all of the downstairs ceiling board up, and lots of the walls too. The weather was hot and humid, and cutting gypsum drywall board with the loose insulation laying around made for a miserable day, but we had good friends helping to offset all of that. We are really looking like a house now, as the kids said over and over.

Here's some pictures to prove it.


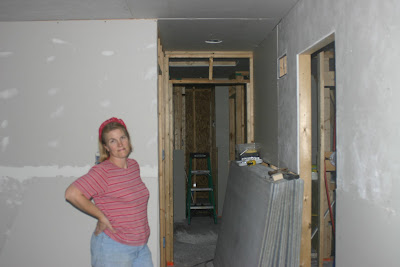
This is looking into the kitchen from the living room.


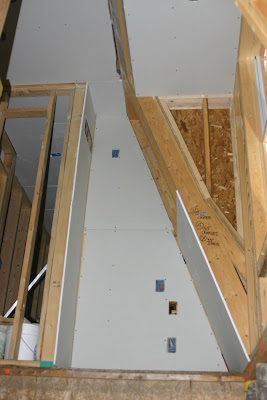
And looking through the stairwell into the living room and kitchen.

Wednesday, May 30, 2007

Insulation, 3-way lights and busted water lines

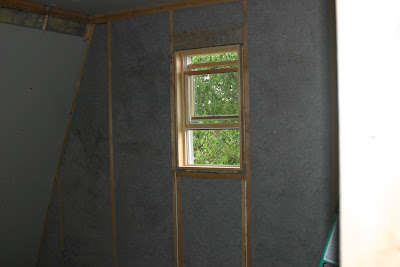
The water line that broke was on the insulation guys pump, not ours. No tragedy for us except the lost time. They did get the walls done in the boys room, the kids bath and part of our room. Here is a picture to show you the NuWool insulation in the dormer walls.


Apparently it's the same cellulose that gets blown into the ceiling for your attic, but NuWool adds a glue and borate solution to discourage pests and add fire retardence. Here is a picture of the entire wall in the boy's room.


And here is a good tip; the NuWool is blown in with the velocity of a good softball pitch and it fills all voids it hits. It's also not the most specific in where it aims, so cover over your outlets and anything you don't want filled. We used cling wrap from Glad that really sticks well to itself and the plastic boxes.

Tuesday, May 29, 2007

Insulation

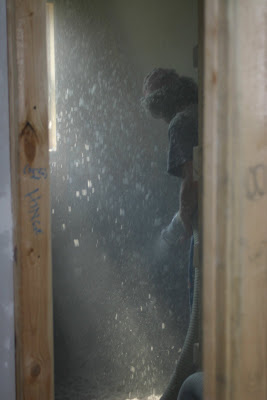
It's in the high 80s today, and the poor guys from Robinson Insulation had to install the NuWool in the heat. They started this morning with the blow-in loose cellulose in the attic and boy did it make a mess!


Take a look.


Then they did the leaning walls/roof that the lower slope of the gambrel roof makes. Linnea and the older son installed the upper portion of the drywall after they filled the lower part. We left the top sheet off to allow them access to fill the voids, but it wasn't needed. It has enough velocity that it blows everywhere and as a result the house now looks like this upstairs:


Tomorrow they will be back at it, doing the gable walls upstairs and exterior and fire-blocking walls downstairs. I am kinda glad that I am back at work for most of this week.

Sunday, May 27, 2007

Take a Sunday off, mostly

Since we went to church today and I wore my dress uniform (Go Air Force--leaving the bombing to us), we went back to the apartment before heading out for the rest of the day. Linnea and I went to Lowes to pick up our water heater and then dropped it off at the house, before going off to a great friends daughter's graduation party. When I grew up out if California that was saved for college, but here in Ohio it seems to be a big thing as we got invited to a couple and everyone seemed to have one. It's not like they won't go on to college, but celebrations are big here. Anyway, after hanging with the Bourkes we went over to the house (about 65 second drive) and I connected the well pressure tank into the PEX manifold while Linnea worked on more tape and mud. We will prepare for the insulation crew tomorrow (run coaxial and CAT 5 cable, finish stubing out the PEX to copper fittings, etc) and have a BBQ at the house tomorrow afternoon to celebrate Memorial Day. Back to work on Tuesday for me and back to the house in the evening.

Saturday, May 26, 2007

Drywall, day three

Here are a couple of quick photos from yesterday's work. The kids started on taping and mudding the sheets; Linnea has said a million times that doing drywall mud is like frosting a cake.

Since she can teach just about anything, she taught our kids how to do it, and they did a pretty good job. Our daughter did the best, and most, while oldest son was continually abused by me as brute force labor and as my sheet hoist.

Here is the view from our bedroom down the hall. Bathroom on the right.


This is the reading nook at the top of the stairs. When the house was framed up to the second deck, but before any walls were up we sat up there and said how nice it was to have a destination most of the way up the stairs, looking out the window. It became a little nook (and yet another place for odd sized drywall pieces) when our daughter and her cat sat there and looked out the window.

Thursday, May 24, 2007

Drywall, day two

Since I took leave from work along with the long Memorial Day weekend, we really hope to get ready for the insulation crew to come in on Tuesday. We finished almost all of the ceiling upstairs today--we need to put up the water resistant board in the showers. After that, we started on the ground floor ceiling in the kitchen, as the wall between the kitchen and laundry/bath will be insulated with the blow-in cellulose NuWool. Our friend Jim came by after lunch to help out--even after he went to the dentist. Now that is real friendship. He helped out hugely, as he used to be a contractor and work in construction. I learned several good tips today from him that will help out with the rest.

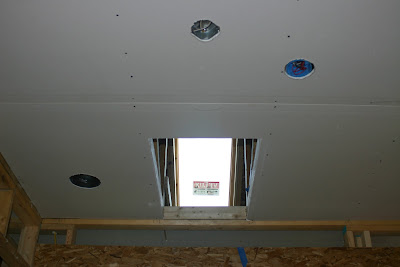
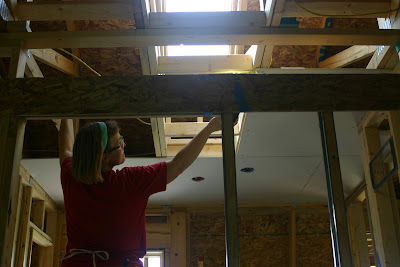
Here are a couple of pictures, especially of the skylight over the stairs. It looks even better than I hoped. It will remain open on the sides for the insulation crew, to allow them to pass their hoses through it.

Last, here is a picture of the upstairs that our son took; you can see the ceiling board across the rooms and a little of the walls up already.

Wednesday, May 23, 2007

Passed the rough inspection

Well, we passed the rough inspection! Troy was happy with just about everything, but we will have to add a receptacle above the second sink in the master bath. That and a few little nit-noids and we were done. Yeah!

On Tuesday the 25,000 pounds of drywall showed up--okay, but it seems like that much. Tony the building supply guy did a more detailed take-off to get a better idea of how much we needed, and with all the supplies it added about $1,300 to that budget category. Good thing we don't need any money. So, we took the rest of the week off and started putting up ceiling board. That's 1/2" gypsum drywall with fibers in it to resist sagging. The crew from Building Specialties boomed the load into each floor and carted it around to each room. Boy is that convenient, but boy is it in the way of putting it up.

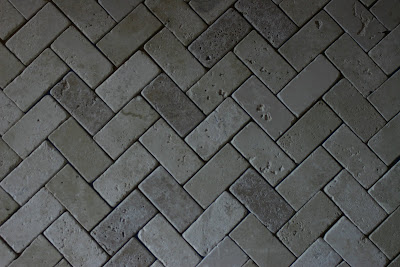
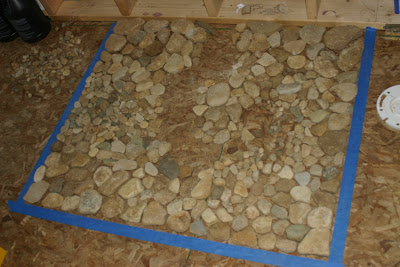
As a bonus, here are the pictures of the two upstairs shower floors Linnea is putting together. The tile is in ours, it's bargain tiles from Lowes. The river rock is for the kid's shower and it's an artistic experiment that Linnea and our daughter are doing. They are going to set the rocks in the concrete with their flat side up to give a smooth floor, yet show off the rocks. I think it will be cool.

Sunday, May 20, 2007

Ready?

Tomorrow we are going to call Troy the Inspector (Inspector Troy?--sounds like a mystery) and schedule our Rough Inspection. It has only taken, umm, way too many months to get this far. Once upon a time we planned, on paper even, to be in Thistle House for Christmas. Anyway, we are over budget and past due for this inspection. I finished the last electrical circuits today with the three-way light switches. I hope I wired those right. It makes sense on paper, or actually on a 2x4, but I have NEVER done one before. Anyway, we need to get to bed so we can call the inspector bright and early.

Friday, May 18, 2007

Rest of the story

Here are the missing photos from the last post about the shower.
Posted by Picasa

Shower pan's going in...


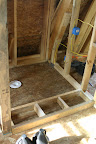
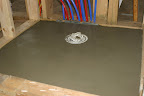
Here's a quick photo series on how Linnea put in the shower pans. We have to get the PVC liner inspected before she can put in the next layer of cement. Speaking of inspections, we are one day from the rest of the Rough Inspection. Travis the electrician came over and helped me finish off the panel, so when I run the well power, septic pump and water heater we will be ready. Tomorrow we will have an early day at the house as daughter is going to the Arthritis Walk fundraiser early in the morning. So we should be able to finish off the rest of the punch list for the inspection.

More on the shower pans. The asphalt paper isn't shown, but it's stapled down to the subfloor, then the concrete is floated in to establish a basic slope to the drain. The drain is a special type that has perforations that let any water that goes under the tile and mortar, but slides on the PVC liner.

Linnea is so pleased to be sitting in her lined shower, just look at the smile! This is the PVC liner on top of the concrete. Linnea got a set of plastic slope guides that install in the shower pan and establish the slope to the drain. I will get a picture of that tomorrow...

Tuesday, May 15, 2007

Passed plumbing, onto framing/electric/HVAC

Barry the plumbing inspector for Miami county was pleased with our setup and gave us the coveted 'Green Tag'. The waste/vent PVC only needed to hold 5 pounds of pressure for fifteen minutes, but we have had it hold overnight almost completely (it leaks around the pressure gauge). The PEX has been holding tight since Saturday. I just realized last night that we can connect the well pressure tank to the cold water side as soon as we have power--even though the other lines will be off, we can have the outside spigots working as soon as we pass the next inspection. Our county requires a pass on the plumbing before the rough framing/electric/HVAC inspection. I am going to call Travis the electrician to help out with finishing it up--especially getting the power to the HVAC. We are nearly there!

Saturday, May 12, 2007

Kinda photo progression

Here is a quick series of pics from this weekend's PEX work. It is holding tight with 30 pounds of pressurized air, the only problems were with the fittings to regular plumbing. I also had the brass cap assembled backwards for closing the hot side. Once we fixed that and tightened the shower diverters, it was good.
This is the start of the hot (red) side. There are 10 hot lines in Thistle House.
This is the first two lines on the hot. I put an elbow in each line to get a nice straight run at the valves on the manifold. It cost about $20, but it's worth it for a clean installation and leak free, worry free assembly.
This is the hot finished, starting on the cold lines. There are 16 of those. I punted on line 16, which goes to the refridgerator. I will 'tee' it in to the washer line as they are in the same stud bay.
Posted by Picasa

Wednesday, May 02, 2007

Cut the red wire! The red wire!

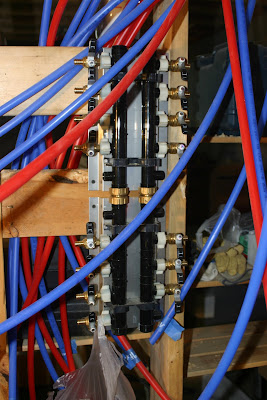
This is the manifold for our PEX plumbing. It's a distribution panel for plumbing, the same as an electric panel distributes electricity across your house. Since there is one side for hot and the other for cold, and each shutoff valve feeds a single line going to a single device (like a toilet or sink), the delivery time of hot or cold water should be instantaneous. It's also like wrestling with a snake, but not an angry anaconda.

We started the manifold connections tonight and as usual, it took longer than planned. So far, I have bought the $180 Zurn multi-size crimper, tubing cutter, a 100+ clips to attach the tubing to the joists, 100 crimp rings and about 20 right angle elbows. I now need to line up solid boards to the left and right of the manifold to clamp the lines to. The PEX has to meet the valve at nearly a perfect straight line to keep pressure off of the valve--which could cause the valve to leak or the line to leak.

Tomorrow is another 'vacation' day at the house, and in the afternoon Travis the electrician will be by to help finish the electrical panel. Should be nearly done with it and ready for the rough plumbing test this week. I will call the inspector for a visual on the rough before we pressure test it.

Sunday, April 29, 2007

Snakes in a Trench!


Travis the electrician and I spent most of yesterday installing the feeder cable from our power panel through the Trench of Despair (and clay), into the two-inch PVC conduit that for some reason decreases it's apparent interior size the further you push or pull the electrical feeder wires.

The trench is the one dug last weekend, and when Linnea asked me if we should install the feeder cable into the plastic drain pipe (to protect the cables from rocks), I naively said, "No, lets keep it indoors until we are ready to hook it up. I don't want to get it stolen." Of course, it's aluminum wire, so not as appealing (or annealing) as copper, and having now spent two sweaty hours just getting it into the drain pipe, I have yet another Lesson Learned. So...

The three 0000 (pronounced four-ought) wires are slightly more flexible than a politician at a party convention, but barely. Trying to get them to traverse the plastic drain pipe with it's interior ridges was like trying to feed an anaconda another anaconda. I ended up cutting a slot into most of the pipe and shoving the wires down into it. The trench also was complicated by the several inches of rain that caved in some of the sides (wet clay on top of the pipe makes it even harder) and the major root for the pine trees that we want to keep just North of the porch.

But before all this, Travis and I made trip number 582 to Lowes to buy yet more house crap. It's amazing how many receipts I have from Lowes. After we are done, I will do a little analysis and put up the numbers. I don't think I am too far off on the number of trips made to Lowes though. Once we had everything needed for the electrical panel, we set to work (and by we I mean Travis as I was wrestling with the anacondas like Jim did on Mutual of Omaha's Wild Kingdom). Travis worked hard in the cool basement as I rolled in the mud and clay with the snakes. Of course, he is the one who knows what he is doing, so it's very appropriate that I was out there doing grunt work. We should have it done tomorrow, assuming we ever get the wires through the conduit.

The conduit has two 90 degree elbows (LBs in the vernacular) that have an opening plate to help in threading the wire through. But the interior LB is RIGHT up against a floor joist, so you can't open it completely or reach more than your two pointer fingers in. Let me tell you, you don't want to have 4-ought wire shoved against two fingers where you can't move them or get them out of the way--I speak from experience. We tried a wire fish taped to the wires, but it pulled off. Next was some rope I had laying about--it stayed on but was too thick to make the second 90 degree turn. Tomorrow we are going to put some small gauge wire inside the wire bundle and pull it through that way.
Posted by Picasa